第一步
最简单的 FastAPI 文件可能如下所示
from fastapi import FastAPI

app = FastAPI()


@app.get("/")
async def root():
    return {"message": "Hello World"}
将其复制到文件 main.py 中。
运行实时服务器
$ <font color="#4E9A06">fastapi</font> dev <u style="text-decoration-style:solid">main.py</u>
<span style="background-color:#009485"><font color="#D3D7CF"> FastAPI </font></span> Starting development server 🚀
Searching for package file structure from directories
with <font color="#3465A4">__init__.py</font> files
Importing from <font color="#75507B">/home/user/code/</font><font color="#AD7FA8">awesomeapp</font>
<span style="background-color:#007166"><font color="#D3D7CF"> module </font></span> 🐍 main.py
<span style="background-color:#007166"><font color="#D3D7CF"> code </font></span> Importing the FastAPI app object from the module with
the following code:
<u style="text-decoration-style:solid">from </u><u style="text-decoration-style:solid"><b>main</b></u><u style="text-decoration-style:solid"> import </u><u style="text-decoration-style:solid"><b>app</b></u>
<span style="background-color:#007166"><font color="#D3D7CF"> app </font></span> Using import string: <font color="#3465A4">main:app</font>
<span style="background-color:#007166"><font color="#D3D7CF"> server </font></span> Server started at <font color="#729FCF"><u style="text-decoration-style:solid">http://127.0.0.1:8000</u></font>
<span style="background-color:#007166"><font color="#D3D7CF"> server </font></span> Documentation at <font color="#729FCF"><u style="text-decoration-style:solid">http://127.0.0.1:8000/docs</u></font>
<span style="background-color:#007166"><font color="#D3D7CF"> tip </font></span> Running in development mode, for production use:
<b>fastapi run</b>
Logs:
<span style="background-color:#007166"><font color="#D3D7CF"> INFO </font></span> Will watch for changes in these directories:
<b>[</b><font color="#4E9A06">'/home/user/code/awesomeapp'</font><b>]</b>
<span style="background-color:#007166"><font color="#D3D7CF"> INFO </font></span> Uvicorn running on <font color="#729FCF"><u style="text-decoration-style:solid">http://127.0.0.1:8000</u></font> <b>(</b>Press CTRL+C
to quit<b>)</b>
<span style="background-color:#007166"><font color="#D3D7CF"> INFO </font></span> Started reloader process <b>[</b><font color="#34E2E2"><b>383138</b></font><b>]</b> using WatchFiles
<span style="background-color:#007166"><font color="#D3D7CF"> INFO </font></span> Started server process <b>[</b><font color="#34E2E2"><b>383153</b></font><b>]</b>
<span style="background-color:#007166"><font color="#D3D7CF"> INFO </font></span> Waiting for application startup.
<span style="background-color:#007166"><font color="#D3D7CF"> INFO </font></span> Application startup complete.
输出中有一行类似
INFO: Uvicorn running on http://127.0.0.1:8000 (Press CTRL+C to quit)
该行显示您的应用程序在本地机器上提供服务的 URL。
检查一下
在浏览器中打开 http://127.0.0.1:8000。
您将看到 JSON 响应为
{"message": "Hello World"}
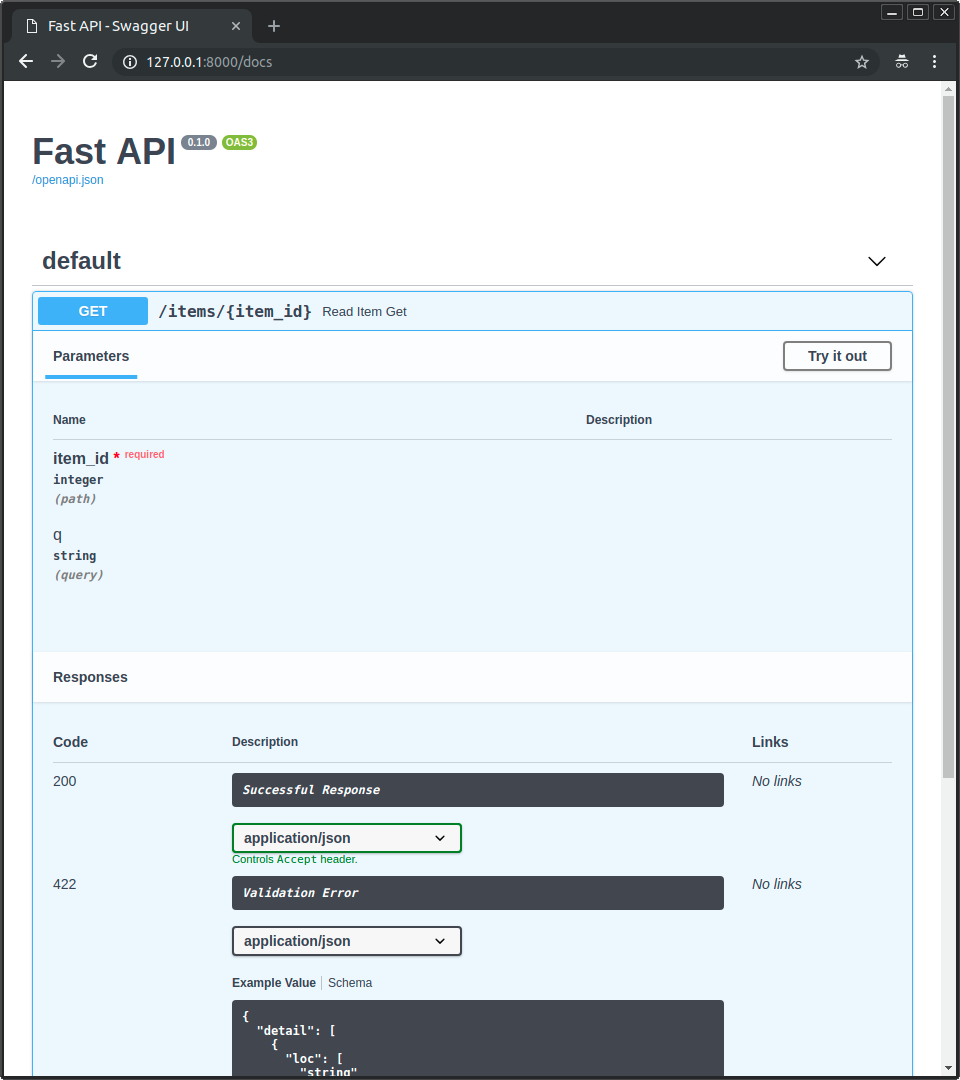
交互式 API 文档
现在转到 http://127.0.0.1:8000/docs。
您将看到自动交互式 API 文档(由 Swagger UI 提供)
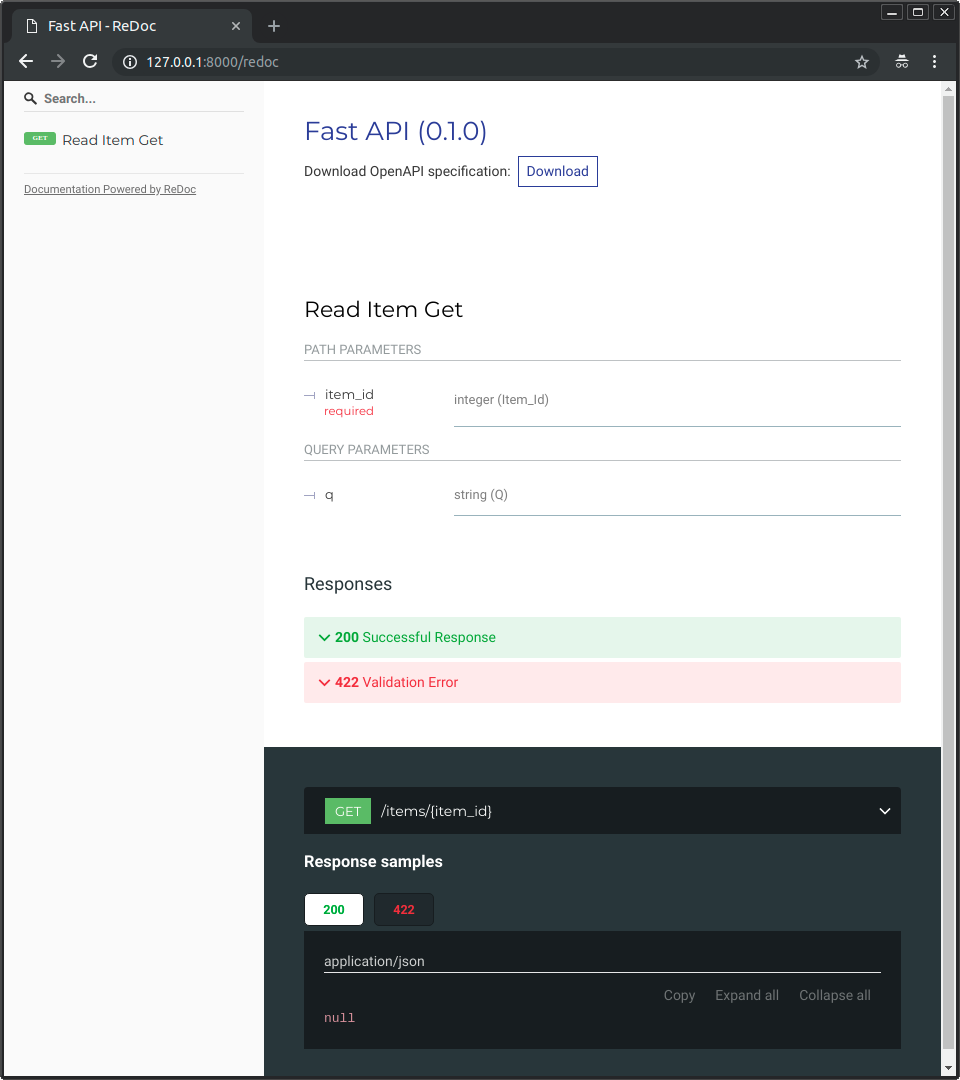
备选 API 文档
现在,转到 http://127.0.0.1:8000/redoc。
您将看到备选的自动文档(由 ReDoc 提供)
OpenAPI
FastAPI 使用 OpenAPI 标准生成包含所有 API 的“schema”。
“Schema”
“schema” 是对某事物的定义或描述。不是实现它的代码,而只是一种抽象描述。
API “schema”
在这种情况下,OpenAPI 是一个规范,它规定如何定义 API 的 schema。
此 schema 定义包括您的 API 路径、它们可能采用的参数等。
数据 “schema”
“schema” 一词也可能指某些数据的形状,例如 JSON 内容。
在这种情况下,它将意味着 JSON 属性及其数据类型等。
OpenAPI 和 JSON Schema
OpenAPI 为您的 API 定义了一个 API schema。该 schema 包含使用 JSON Schema(JSON 数据 schema 的标准)发送和接收的数据的定义(或“schemas”)。
检查 openapi.json
如果您好奇原始 OpenAPI schema 是什么样子,FastAPI 会自动生成一个 JSON(schema),其中包含所有 API 的描述。
您可以直接在:http://127.0.0.1:8000/openapi.json 上查看。
它将显示一个 JSON,开头类似
{
    "openapi": "3.1.0",
    "info": {
        "title": "FastAPI",
        "version": "0.1.0"
    },
    "paths": {
        "/items/": {
            "get": {
                "responses": {
                    "200": {
                        "description": "Successful Response",
                        "content": {
                            "application/json": {


...
OpenAPI 有什么用
OpenAPI schema 是支持两个包含的交互式文档系统的基础。
并且有数十种替代方案,所有这些都基于 OpenAPI。您可以轻松地将任何这些替代方案添加到使用 FastAPI 构建的应用程序中。
您还可以使用它自动生成与您的 API 通信的客户端代码。例如,前端、移动或物联网应用程序。
回顾,逐步
第 1 步:导入 FastAPI
from fastapi import FastAPI

app = FastAPI()


@app.get("/")
async def root():
    return {"message": "Hello World"}
FastAPI 是一个 Python 类,它为您的 API 提供所有功能。
第 2 步:创建一个 FastAPI “实例”
from fastapi import FastAPI

app = FastAPI()


@app.get("/")
async def root():
    return {"message": "Hello World"}
这里的 app 变量将是 FastAPI 类的一个“实例”。
这将是创建所有 API 的主要交互点。
第 3 步:创建一个 路径操作
路径
这里的“路径”指的是从第一个 / 开始的 URL 的最后一部分。
因此,在像这样的 URL 中
https://example.com/items/foo
...路径将是
/items/foo
信息
“路径”也通常称为“端点”或“路由”。
在构建 API 时,“路径”是分离“关注点”和“资源”的主要方式。
操作
这里的“操作”指的是 HTTP“方法”之一。
其中一个
POSTGETPUTDELETE
...以及更不常见的方法
OPTIONSHEADPATCHTRACE
在 HTTP 协议中,您可以使用这些“方法”中的一个(或多个)与每个路径通信。
在构建 API 时,您通常使用这些特定的 HTTP 方法来执行特定操作。
通常您使用
POST:创建数据。GET:读取数据。PUT:更新数据。DELETE:删除数据。
因此,在 OpenAPI 中,每个 HTTP 方法都称为“操作”。
我们也将它们称为“操作”。
定义一个 路径操作装饰器
from fastapi import FastAPI

app = FastAPI()


@app.get("/")
async def root():
    return {"message": "Hello World"}
@app.get("/") 告诉 FastAPI 下面的函数负责处理发送到
- 路径
/ - 使用
get操作
@decorator 信息
Python 中 @something 语法称为“装饰器”。
您将其放在函数上方。就像一顶漂亮的装饰帽(我想这就是这个词的来源)。
“装饰器”获取下面的函数并对其进行操作。
在我们的例子中,这个装饰器告诉 FastAPI 下面的函数对应于 路径 / 和 操作 get。
它是“路径操作装饰器”。
您还可以使用其他操作
@app.post()@app.put()@app.delete()
以及更不常见的方法
@app.options()@app.head()@app.patch()@app.trace()
提示
您可以随意使用每个操作(HTTP 方法)。
FastAPI 不强制执行任何特定含义。
这里提供的信息是作为指导,而不是要求。
例如,当使用 GraphQL 时,您通常只使用 POST 操作执行所有操作。
第 4 步:定义 路径操作函数
这是我们的“路径操作函数”
- 路径:是
/。 - 操作:是
get。 - 函数:是“装饰器”下面的函数(
@app.get("/")下面)。
from fastapi import FastAPI

app = FastAPI()


@app.get("/")
async def root():
    return {"message": "Hello World"}
这是一个 Python 函数。
每当 FastAPI 收到使用 GET 操作访问 URL “/” 的请求时,它都会调用该函数。
在这种情况下,它是一个 async 函数。
您也可以将其定义为普通函数,而不是 async def
from fastapi import FastAPI

app = FastAPI()


@app.get("/")
def root():
    return {"message": "Hello World"}
注意
如果您不知道区别,请查看 异步:“赶时间?”。
第 5 步:返回内容
from fastapi import FastAPI

app = FastAPI()


@app.get("/")
async def root():
    return {"message": "Hello World"}
您可以返回 dict、list、单个值(如 str、int 等)。
您还可以返回 Pydantic 模型(稍后您将了解更多)。
还有许多其他对象和模型将自动转换为 JSON(包括 ORM 等)。尝试使用您喜欢的,它们很可能已经受支持。
总结
- 导入
FastAPI。 - 创建一个
app实例。 - 使用
@app.get("/")等装饰器编写 路径操作装饰器。 - 定义 路径操作函数;例如,
def root(): ...。 - 使用命令
fastapi dev运行开发服务器。